
I was able to test out a new sprayer I bought for priming tonight… while priming. It’s a “Critter” and it works on the same venturi principle as the small airbrush that I have been using, except it’s bigger.
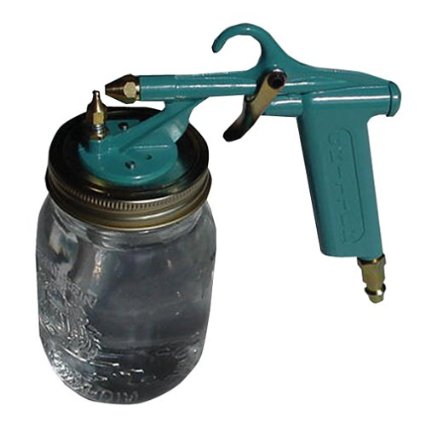
Instead of a little 2oz plastic cup (with all harbor freight plastic parts) it uses a mason jar. The tip and pick up tube are also both metal. It really makes the priming go faster, but it also has a lot more over-spray and leaves a little rougher finish to the primer. I’ll have to play with it more to try to get it dialed in.
With the parts all primed and ready to go, I should be able to start riveting tomorrow. I think this is going to be the first part where I will need someone to help me with the riveting. I believe that the skins are too big for one person to hold both the bucking bar and the rivet gun, so either Colleen or my dad will be getting a rivet gun training session!


Tomorrow is also the spring meeting of the Twin Cities RV Builders Group in St. Paul. I’m looking forward to meeting a bunch of other builders. I’m also hoping to meet one of the EAA Tech Councilors that are in the club and see if I can’t get them to visit. An experienced set of eyes is always a good thing!
And again, I’m not capturing any of the priming in time-lapse. Just not a good way of doing it.
Hi Ed,
Please forgive me if you posted this elsewhere. What did you do for your priming process? What materials did you use?
David,
My post about my primer decisions is here:
http://www.goodplaneliving.com/primers-decisions-and-building-a-spray-booth/